August 26, 2019
|
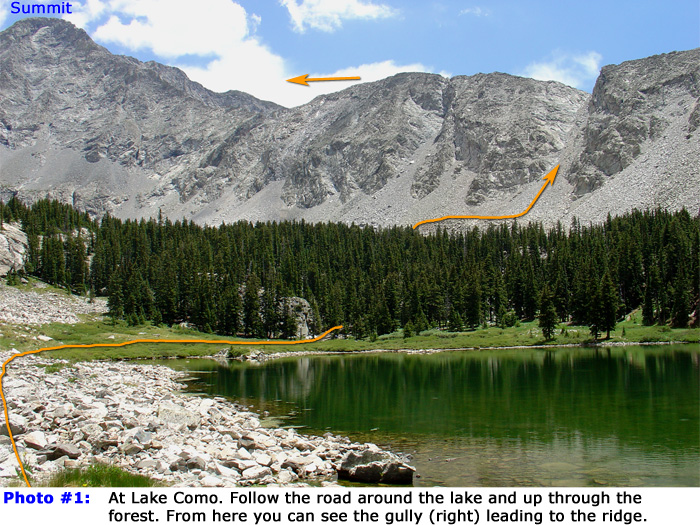
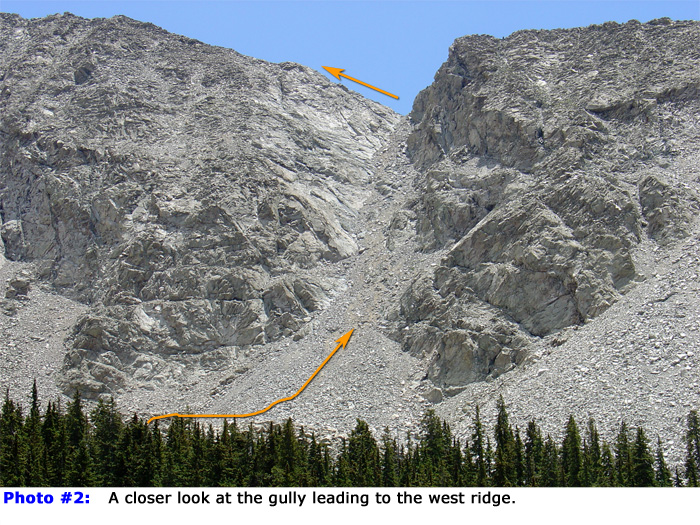
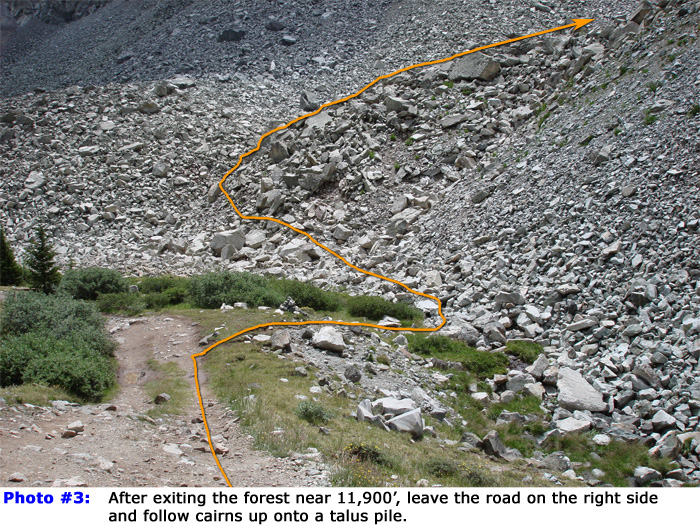
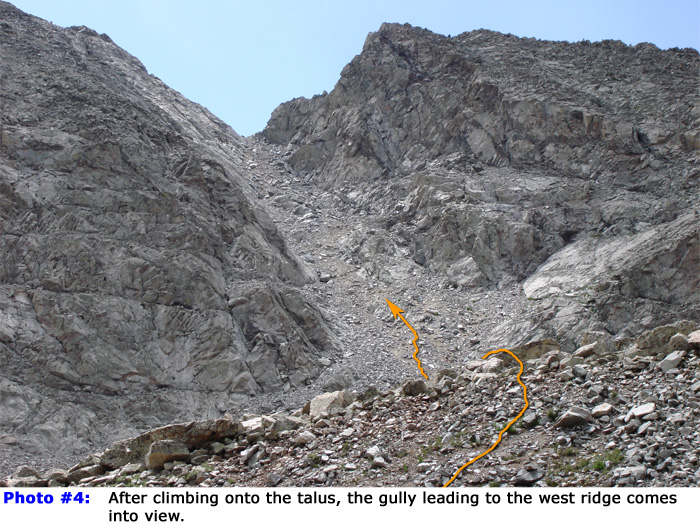
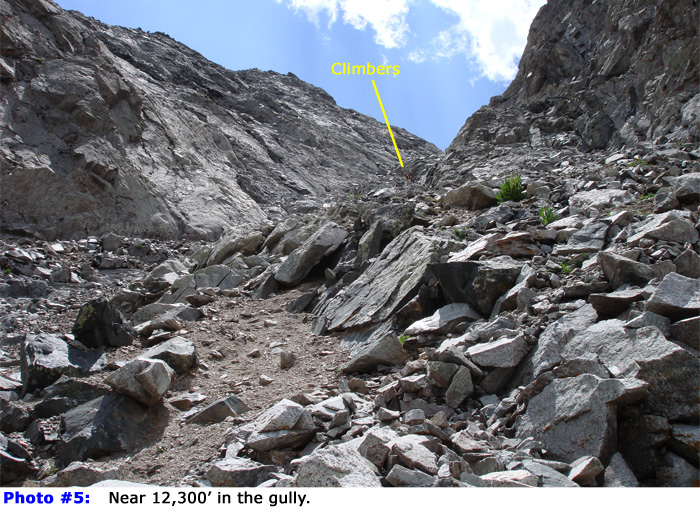
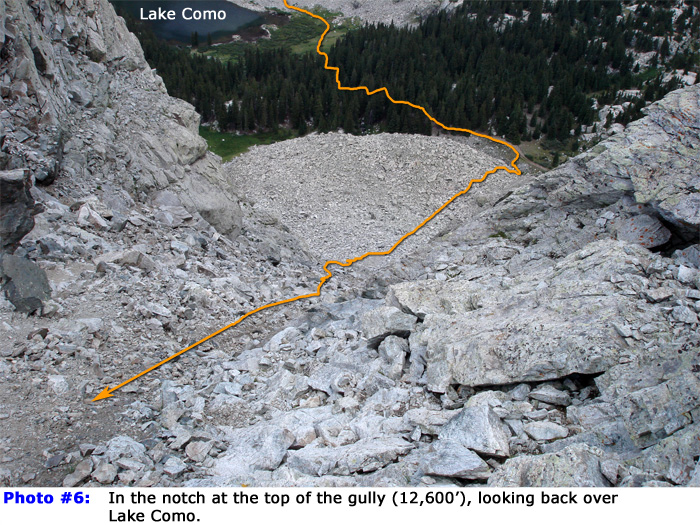
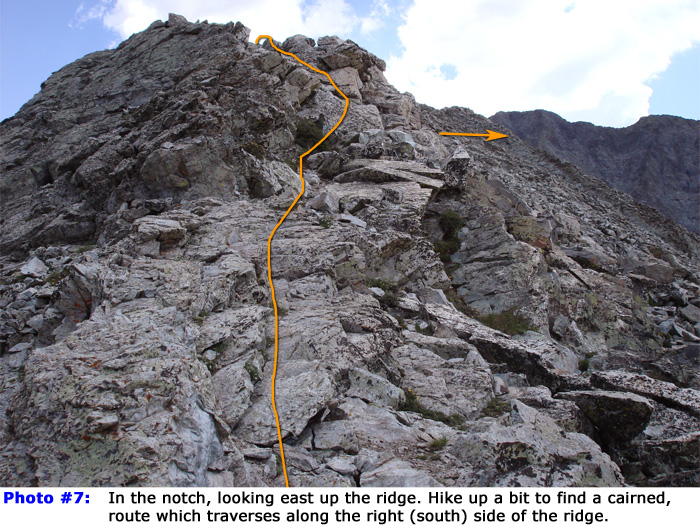
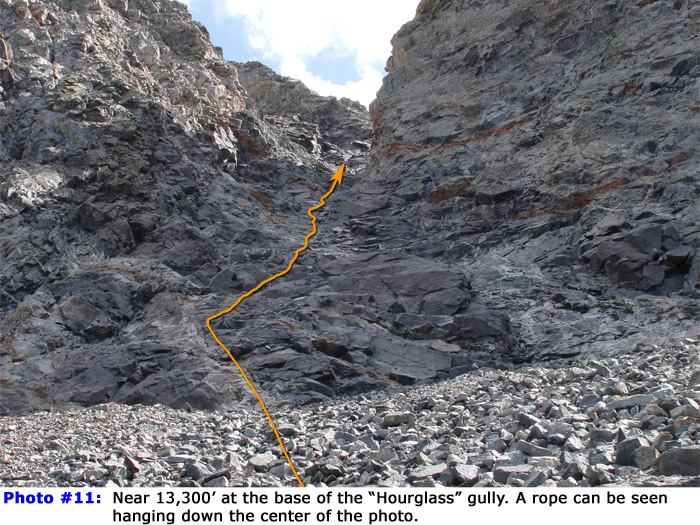
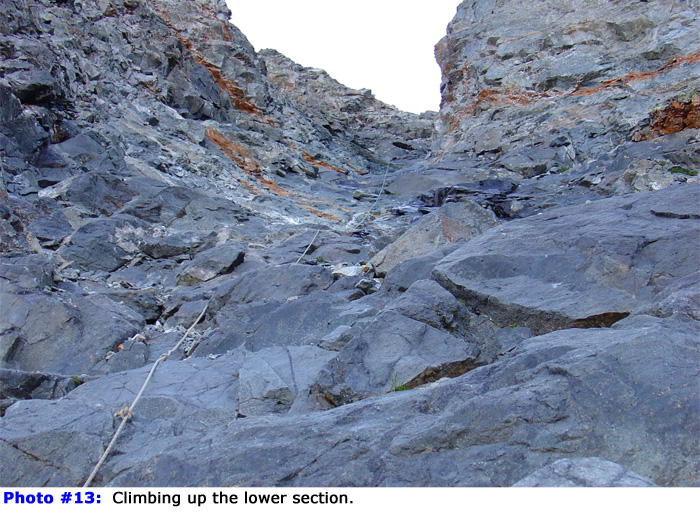
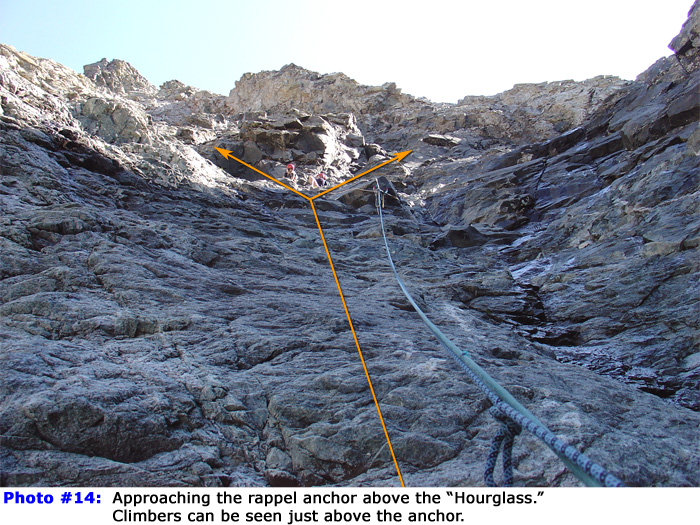
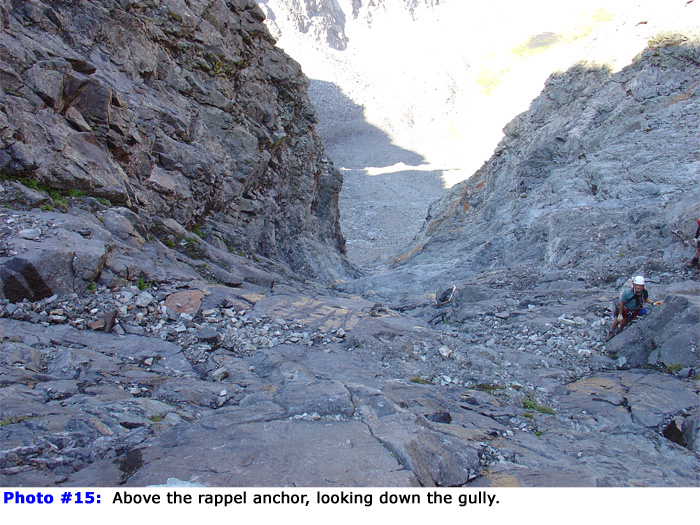
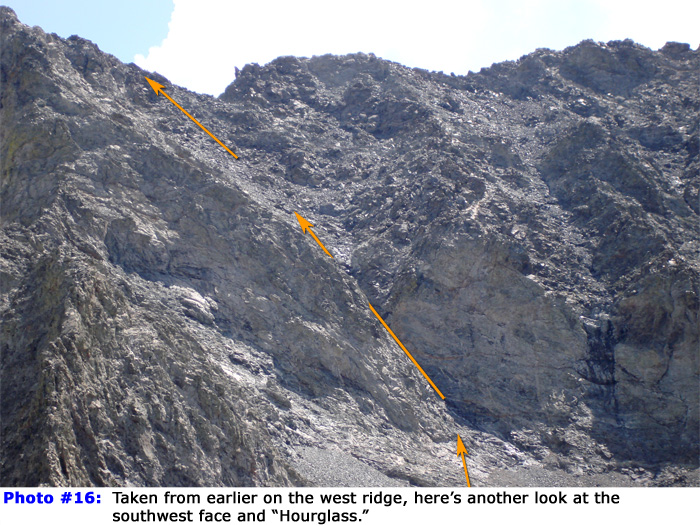
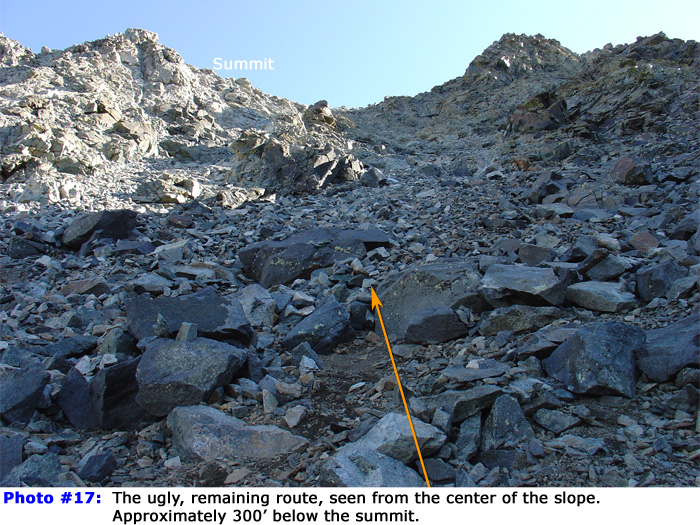
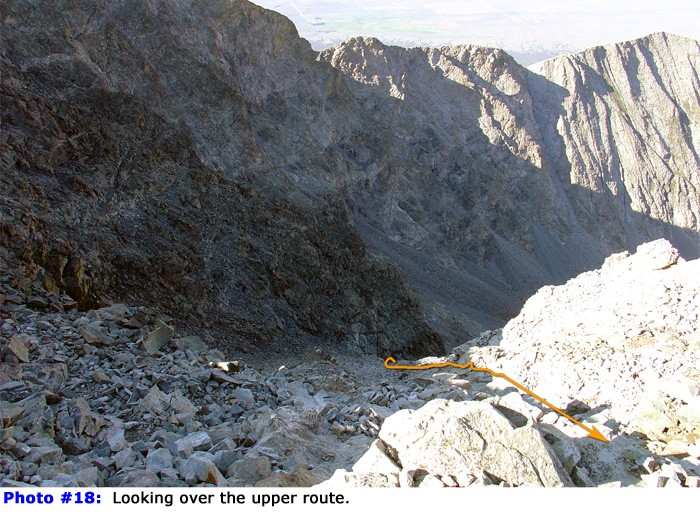
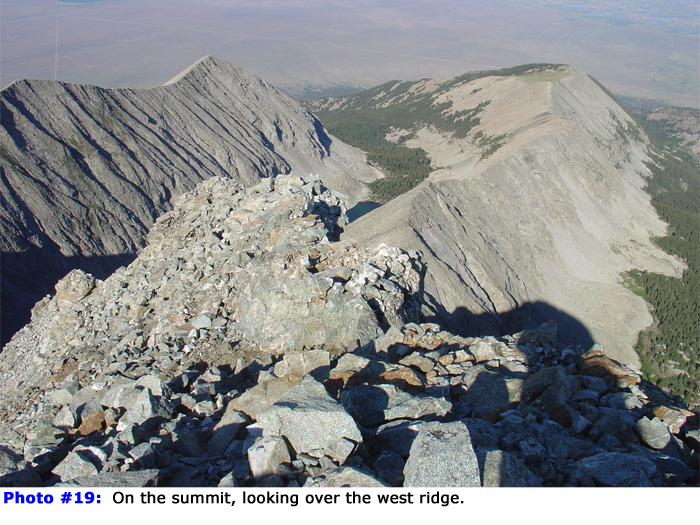
Little Bear Peak
West Ridge and Southwest Face
APPROACH: From Colorado 160, east of Alamosa, turn north onto Colorado 150 toward Great Sand Dunes National Park. Drive over 3 miles and turn right onto Lake Como road (aka Blanca Peak road). The type of vehicle you are driving will determine how high you can park on Lake Como road. Most cars can drive about 1.5 miles up before it gets rough. 4WD SUVs and trucks can slowly make it 3.25 miles to several pull-offs at 8,800', before the road turns nasty. This is a popular parking spot and gets you within 4 miles of Lake Como. If you have a very high-clearance, small, 4WD vehicle, you can drive higher. An ATV or heavily-modified jeep/crawler can go to Lake Como. ROUTE: This loose, dangerous route is probably the most difficult standard 14er route. Climbing this route on a busy weekend is definitely not recommended. Follow the Lake Como Approach to reach the lake at 11,750'. From the lake, Little Bear is to the southeast - Photo #1. On the side of Little Bear's West Ridge locate a gully that climbs to a notch in the ridge - Photo #1 and Photo #2. The route uses this gully to reach the West Ridge. Continue on the road around the lake and up into the forest between Lake Como and the West Ridge. After leaving the forest, the road drops a bit to reach 11,900' - Photo #3. This is where the route to Little Bear splits away from the road. Look for a cairn on the right just above a small stream. Cross the stream, turn left, and follow cairns that lead left and then up on the side of a talus pile south of the road. Continue to follow cairns and trail segments to the top of the talus (~12,000') where the gully comes into view - Photo #4. From the bottom of the gully, it's about 600' of elevation gain to reach the notch in the top. Continue over talus and begin the ascent toward the West Ridge. The climb starts up the center of the gully but then it's easier to stay near more solid rock on the right side. The gully is steep enough for rocks to slide and fly toward the bottom. Follow a faint trail in some areas and pick your own line in others. Taken about 1/2 way up the gully, Photo #5 shows the terrain. Reach the top of the gully near 12,600' at a notch in the West Ridge. Turn left (east), climb out of the notch, and begin climbing up the ridge on good rock - Photo #7. After some brief elevation gain, locate a small, cairned trail that traverses across the right side of the ridge. The trail will disappear in spots but just keep looking for small cairns. 1/4 mile after leaving the notch, bypass the top of a 12,960-foot ridge point by continuing the traverse below the ridge crest. From the side of this point, Photo #8 is the view of the remaining route. You do not have to climb to the top of this point - continue searching for cairns and trail segments. Descend slightly to a large notch in the ridge where the remaining hike to the bottom of the Southwest Face is fairly obvious - Photo #9. Traverse across the rugged slope to reach the Southwest Face and the bottom of a gully often called the "Hourglass." Photo #10 looks back at the traverse along the West Ridge. To this point, the route has barely exceeded Difficult Class 2, but that's about to change. The remaining route consists of dangerous climbing on Class 3 and Class 4 rock. This is a good place to take a careful look at the weather. If bad weather is moving on, turn back. The upper Southwest Face is no place to be caught in a thunderstorm. Locate the "Hourglass" gully above 13,300' (Photo #11) and you may see a fixed rope (or two) in the narrow section above. An existing rope may be helpful for support, but it's not a great idea to rely on it without having inspected the condition of the entire rope and it's anchor. Scramble up onto the Class 3 rock below the narrow part of the gully and start climbing. Photo #12 is another look at the lower section. As you climb closer to the narrow section, you don't have a lot of options, but the rock is fairly stable - Photo #13. Continue up solid, Class 4 rock to reach the top of the fixed rope (if one is present) and the rock anchor - Photo #14. Photo #15 looks down the route from just above the anchor. It's decision time again. The remaining route to the summit is loose and dangerous. Route finding is a bit of an issue, but the major problem is keeping rocks from falling into the gully. The terrain spreads out and there is no clean line to the summit. The easiest way is to climb left away from the anchor on the most solid rock you can find. Taken from below, Photo #16 is a review of the upper route. After about 100', the terrain eases slightly but the problem with loose rock will come and go. If you climb the left of the slope, do not go all the way left to the edge of the ridge. As you climb higher, angle back to the center of the slope to find broken trail segments or cairns that lead toward the top. Photo #17 looks toward the summit from approximately 13,750'. If you climbed the right side of the slope, cairns and easier terrain will lead you toward the center of the slope below the summit. Pick your line and gain the summit. Photo #18 looks directly down the Southwest Face from the top. Photo #19 and Photo #20 show some of the spectacular views from Little Bear's summit. Difficulty:
Class 4
|